Off-Road Driving Essentials
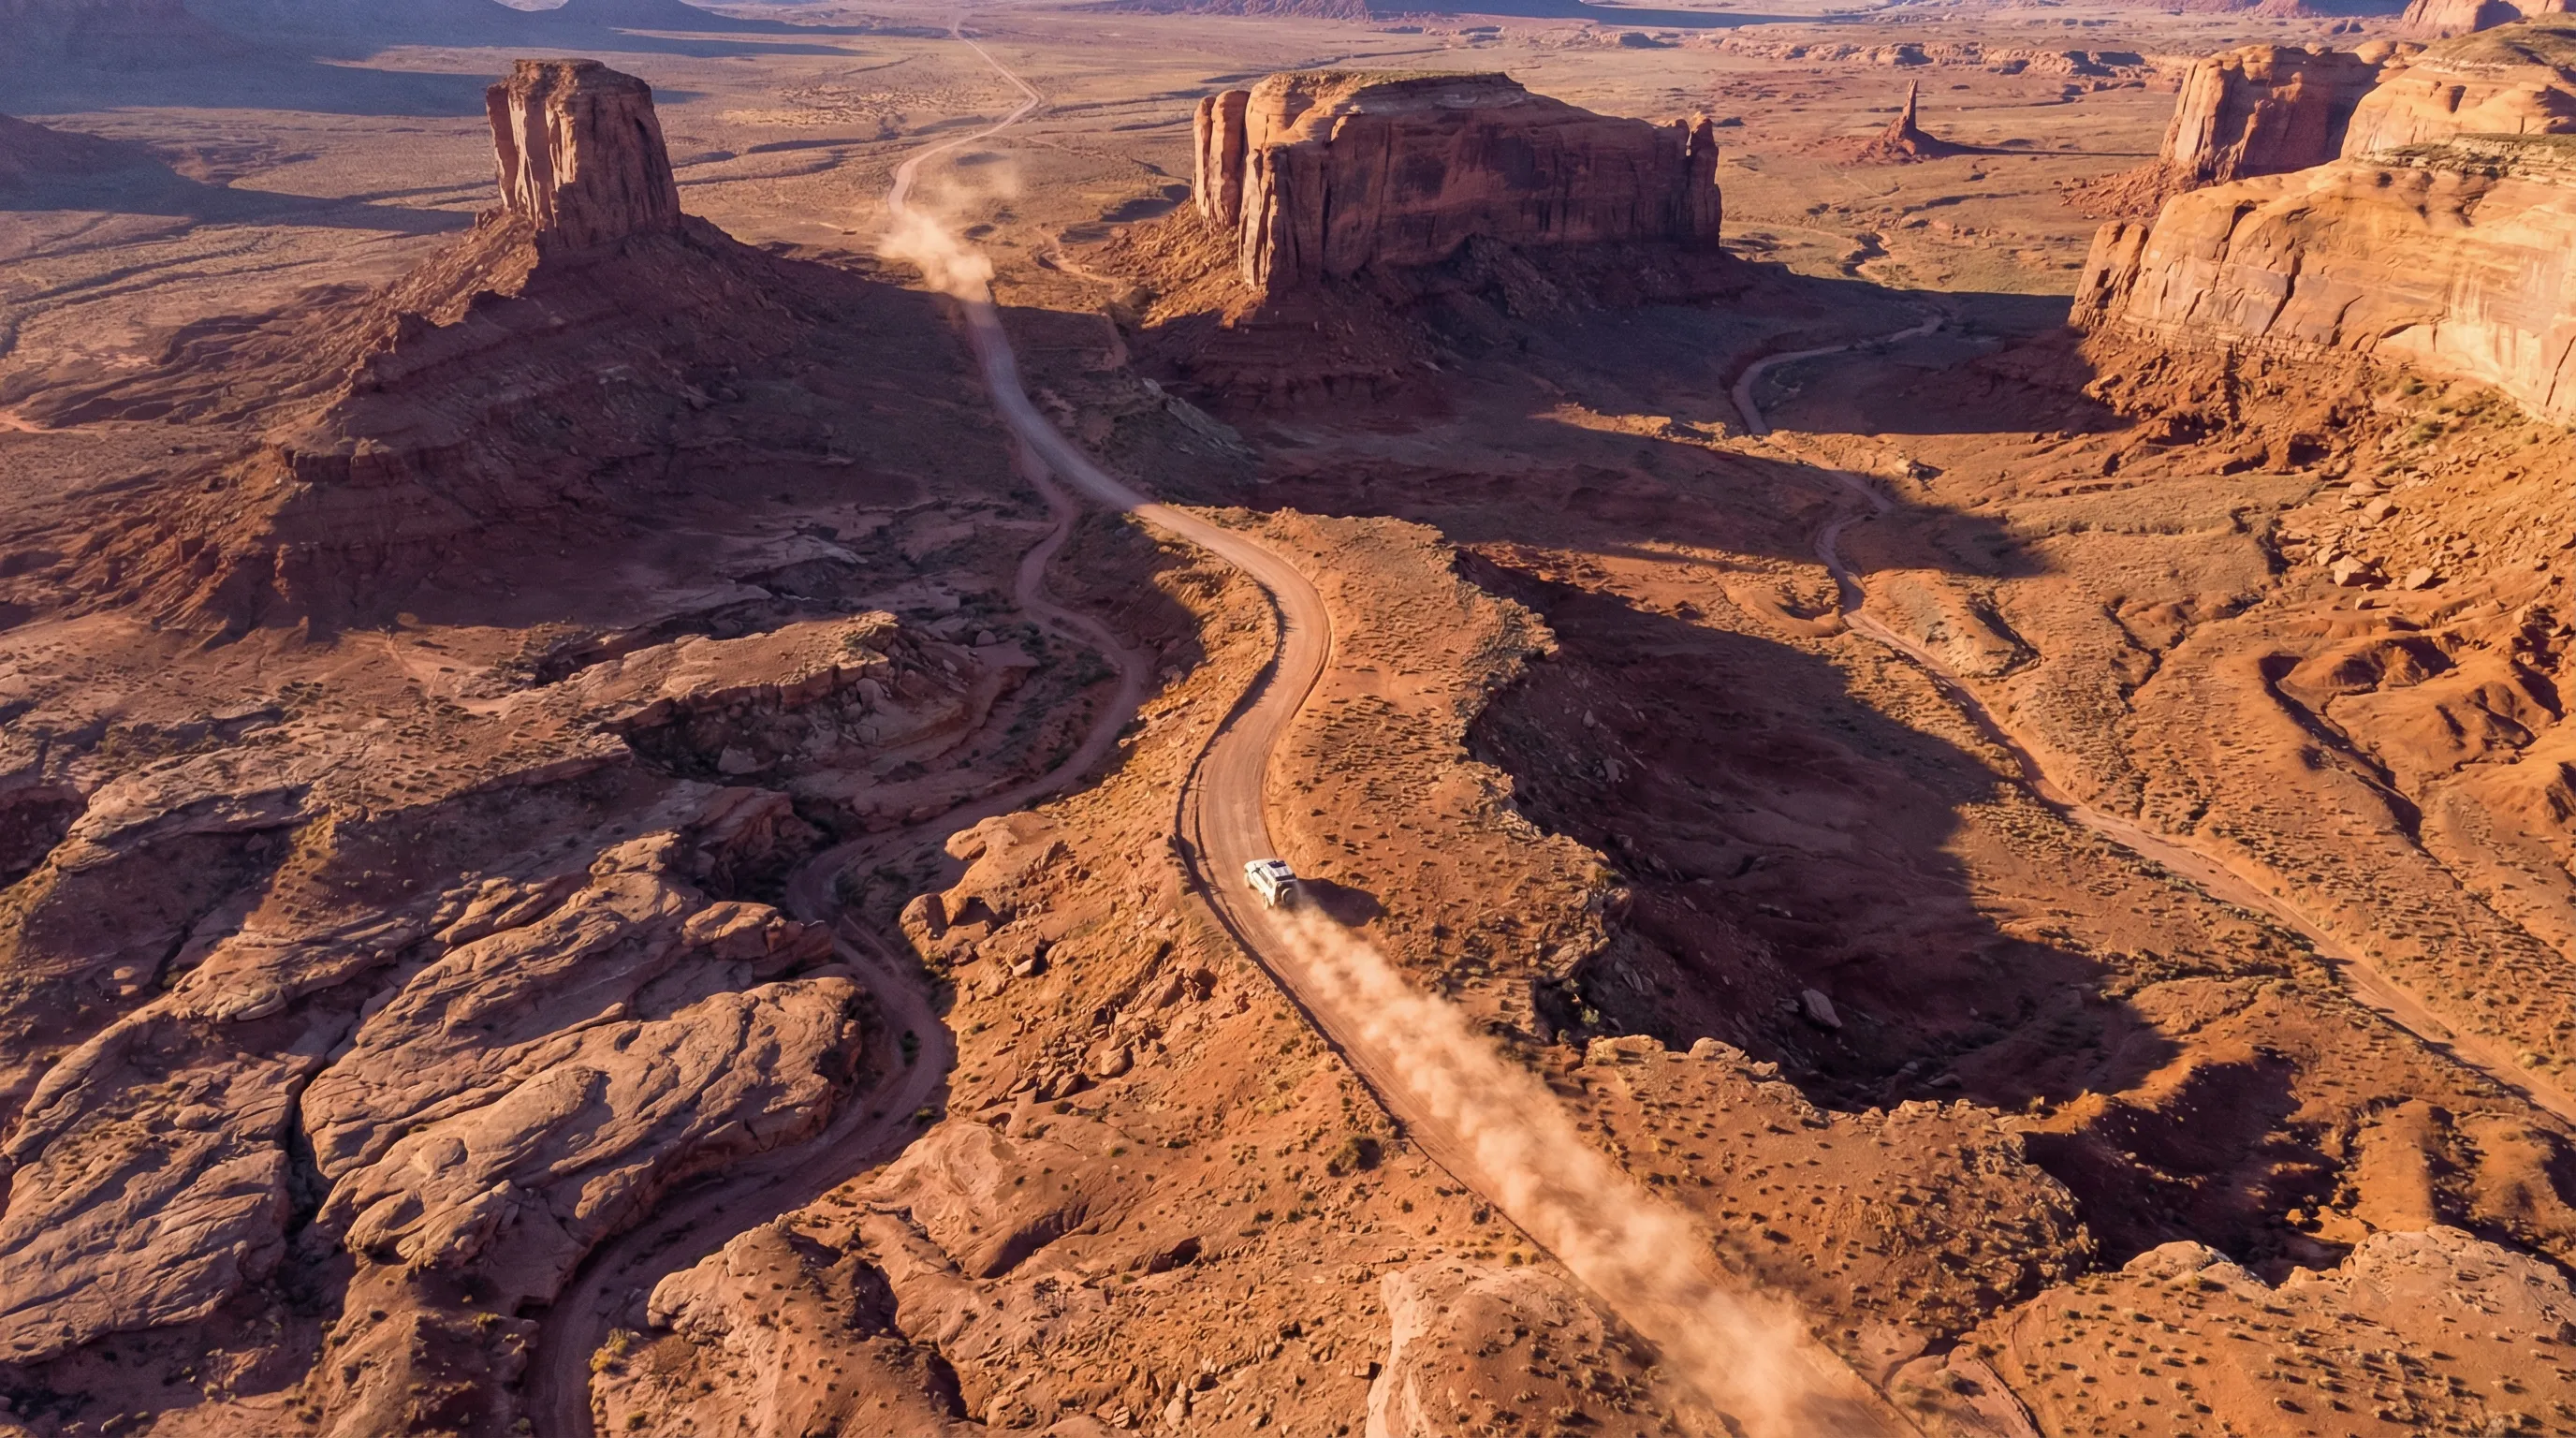
The first time we drove into Wadi Rum on full highway tire pressure, we learned three things in rapid succession. First, that sand at 35 PSI feels like driving on marbles. Second, that the rear end of a Toyota Prado can swing sideways faster than you expect. Third, that the Bedouin guide watching from his pickup was laughing hard enough to need a moment before he came over to explain what we were doing wrong. He told us to drop to 18 PSI. We did. The vehicle stopped trying to throw us sideways. The tires gripped. The sand became drivable. A $3 tire gauge and 90 seconds of deflation turned an impossible surface into a manageable one.
That is the essence of off-road driving: small adjustments with large consequences. This guide covers the fundamentals that apply to every unpaved road we have driven across 13 countries.
Tire pressure by terrain
Tire pressure is the single most important variable you can control off-road. Lowering pressure increases the tire’s contact patch with the ground, which improves grip in loose surfaces and reduces the chance of punctures on rocky terrain (a softer tire deforms around rocks instead of being cut by them). It also dramatically changes the vehicle’s handling, ride comfort, and fuel consumption.
The table below reflects what we actually run, not textbook numbers. Your ideal pressure will vary depending on tire size, vehicle weight, and load — treat these as starting points.
| Terrain Type | Recommended PSI | Notes |
|---|---|---|
| Paved highway | 32-36 | Manufacturer specification. Check the door sticker. |
| Well-graded gravel | 28-32 | Slight reduction improves comfort and grip |
| Rough gravel / corrugations | 24-28 | Significant comfort improvement. Reduces corrugation vibration. |
| Rocky terrain | 22-26 | Lower pressure helps the tire conform to rocks. Reduces puncture risk. |
| Mud | 20-24 | More contact patch = more grip. But too low and the tire fills with mud. |
| Sand (firm, coastal) | 18-22 | The tire needs to float on the surface, not dig in. |
| Sand (soft, dunes) | 12-18 | As low as your rim allows. We have run 15 PSI in Wadi Rum and Wahiba Sands. |
| River crossings | 24-28 | Slightly lower for traction on the river bed. Re-inflate after if returning to gravel. |
Critical rules for tire deflation
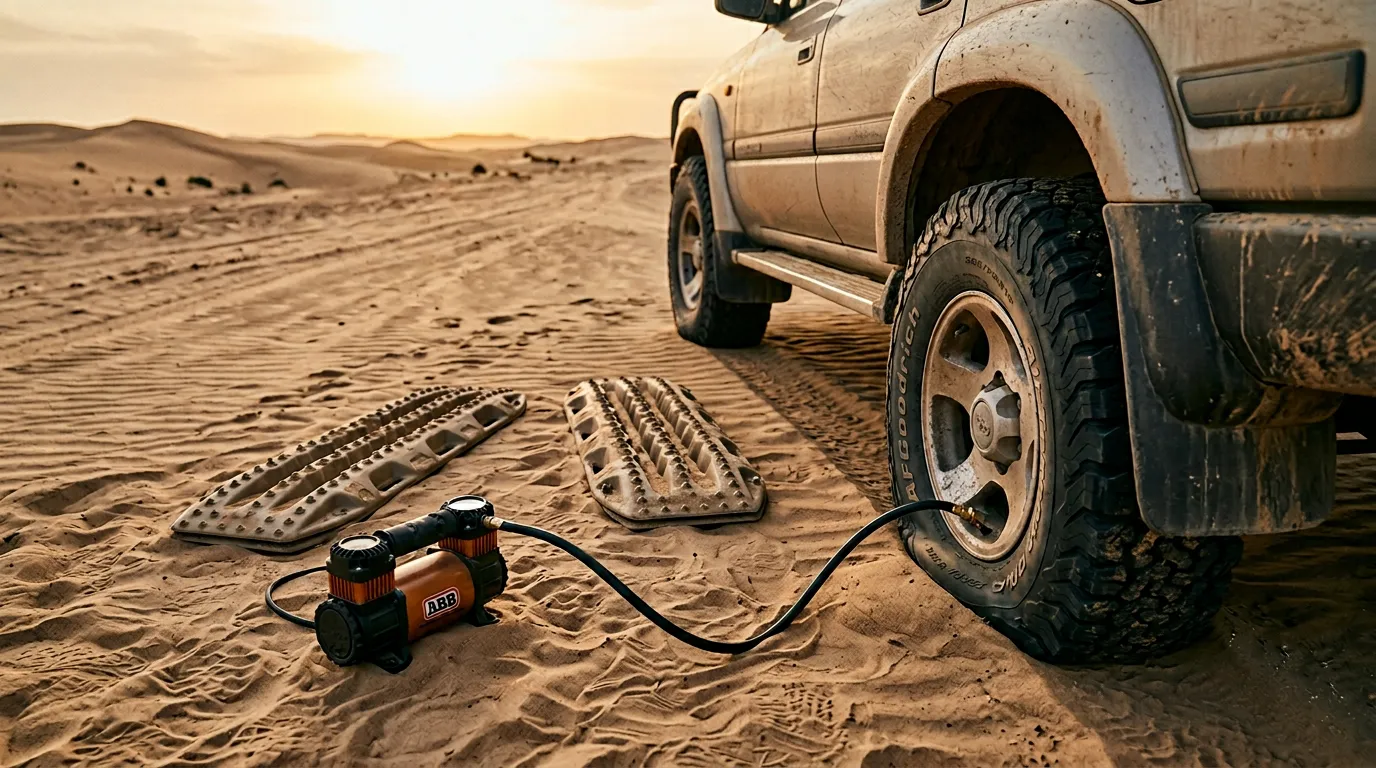
Always carry a compressor. If you deflate tires for a sand section, you need to re-inflate before returning to gravel or pavement. Driving on pavement at 18 PSI will overheat the tire, damage the sidewalls, and potentially cause a blowout. A 12V compressor that plugs into the cigarette lighter socket costs $30-80 and is non-negotiable equipment.
Know your rim size. If you go too low, the tire bead can unseat from the rim. For standard 16-17 inch rims on rental 4x4s, we do not go below 15 PSI. For 15 inch rims (Suzuki Jimny), 18 PSI is our lower limit.
Deflate all four tires equally. Uneven pressure creates unpredictable handling. If you drop the fronts to 20 PSI, drop the rears to 20 PSI.
Speed limits change when deflated. At 18 PSI, your maximum safe speed is about 40-50 km/h. At 15 PSI, stay under 30 km/h. The lower the pressure, the more the tire deforms at speed, and the more heat builds in the sidewall.
Check pressure when cold. Driving heats the tires and increases pressure by 2-4 PSI. Measure and adjust before you start driving, not after a long gravel section.
Recovery gear
Getting stuck is not a question of if. It is a question of when, where, and how prepared you are.
The essentials (carry on every off-road trip)
Recovery boards. Maxtrax is the best-known brand, but any rigid traction board works. These go under your tires when stuck in sand or mud to provide a surface the tires can grip. We have used them in sand in Jordan and Oman, in mud in Georgia, and in a particularly embarrassing situation involving a shallow ditch in Albania. A pair weighs about 4 kg and takes up minimal space. Worth every gram.
Tow strap. Not a tow rope — a flat strap rated for at least twice your vehicle’s weight (most rental 4x4s weigh 1,800-2,500 kg). A 5,000 kg rated strap costs $15-25. The strap needs a loop at each end to attach to recovery points. Shackles (bow shackles, D-shackles) connect the strap to the vehicle’s tow points.
Shovel. A folding or compact shovel. When stuck in sand, you often need to dig out the sand from in front of and behind each tire before the recovery boards can work. A flat-blade shovel is more useful than a pointed one for this.
Compressor and tire gauge. Already covered above, but listing again because they are also recovery equipment. Deflating tires further is sometimes the difference between stuck and not stuck.
The full kit (for Challenging/Expert routes)
Hi-lift jack. The standard scissor jack from the rental car cannot lift the vehicle high enough to place recovery boards under the tires in soft ground (the jack sinks into the sand). A hi-lift jack with a base plate, or an exhaust jack, can lift the vehicle on soft surfaces. Exhaust jacks are simpler — you attach a bag to the exhaust pipe and the engine’s exhaust inflates it, lifting the vehicle. They work well but are slow.
Snatch strap. Different from a tow strap. A snatch strap is elasticated — it stretches under load and then contracts, transferring the pulling vehicle’s momentum to the stuck vehicle. More effective than a static tow strap for extracting a deeply bogged vehicle. These require careful technique and should not be used without understanding the physics. A failed snatch recovery can fling a shackle through a windshield.
Winch. Rarely available on rental vehicles but worth mentioning. If you own your vehicle or rent from a specialist overlanding outfit (common in Namibia and South Africa), a winch is the ultimate recovery tool for solo or two-vehicle trips.
Tire repair kit. A plug kit for tubeless tires. Rental vehicles almost always have tubeless tires. A plug kit lets you repair a puncture caused by a nail, thorn, or small rock in about 15 minutes without removing the tire from the rim. Kits cost $10-15. We carry one on every trip and have used it three times.
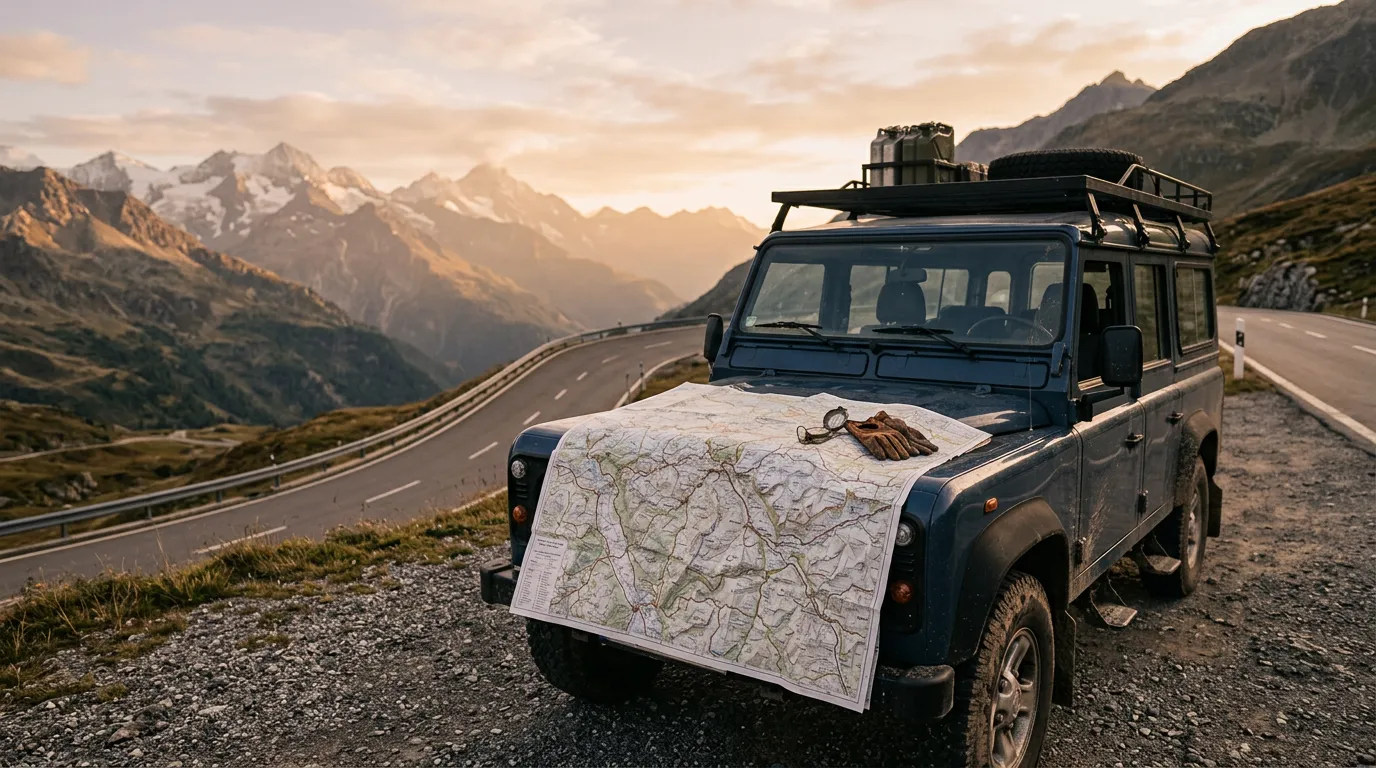
Navigation
Paper maps still exist and they still work when your phone is dead, wet, or displaying a blank screen because you are in a satellite black spot. That said, digital navigation has changed off-road travel fundamentally, and we use a combination of tools on every trip.
Offline maps (primary navigation)
Maps.me. Free. Covers the entire world. Based on OpenStreetMap data, which means it often shows dirt tracks that Google Maps ignores. The key advantage for off-road use: Maps.me includes unpaved roads, 4x4 tracks, and footpaths that other mapping apps omit. The key disadvantage: the data is crowdsourced and sometimes inaccurate. A track shown on Maps.me may not exist on the ground, or may have been washed out since the last contributor updated it.
Gaia GPS. Paid ($40/year). Overlays multiple map layers including topographic maps, satellite imagery, and trail networks. The satellite layer lets you visually confirm whether a track exists before you attempt it. We use Gaia for route planning and Maps.me for in-vehicle navigation.
Google Maps (offline). Download map regions before you leave cell coverage. Google Maps is reliable for paved roads and major gravel highways but generally does not show minor dirt tracks. Useful as a backup and for finding fuel stations, but not sufficient as your only navigation tool off pavement.
OsmAnd. Open-source, based on OpenStreetMap. More configurable than Maps.me with support for custom map layers. Popular with European overlanders. The interface is not intuitive, but the data quality is similar to Maps.me.
GPS devices
A dedicated GPS unit (Garmin Overlander, Garmin Montana, etc.) is not essential if you have a smartphone with offline maps and a way to keep it charged. However, a dedicated GPS has advantages in extreme conditions: better waterproofing, longer battery life, glove-compatible touchscreens, and a separate battery that does not drain your communication device.
We carry a smartphone as primary nav and a Garmin inReach Mini as a backup and communication device.
Paper maps
For remote routes, carry a paper map of the region. The best off-road paper maps we have used:
| Country/Region | Map Publisher | Scale | Notes |
|---|---|---|---|
| Morocco (Atlas/Sahara) | Michelin 742 | 1:1,000,000 | Shows major pistes. Not detailed enough for navigation but useful for overview. |
| Namibia | Tracks4Africa | 1:1,000,000 | The standard overland map. Shows fuel, camping, road conditions. |
| Iceland | Ferdakort | 1:250,000-600,000 | Detailed enough for F-roads. Shows river fords. |
| South Africa | Tracks4Africa | 1:1,000,000 | Same series as Namibia. Essential for passes and 4x4 trails. |
| Jordan | RSCN maps | Various | Available at visitor centres. Good for Wadi Rum and Dana. |
| Georgia | Geoland Caucasus | 1:200,000 | Hard to find but excellent. Shows Tusheti and Svaneti tracks. |
Waypoints and breadcrumb trails
For routes without a defined track (desert pistes, plateau crossings), record a GPS breadcrumb trail as you drive. If you need to retrace your route or if visibility drops (sandstorm, fog, darkness), your own track is the most reliable way back. Both Gaia GPS and OsmAnd support breadcrumb recording. Turn it on before you leave the last paved road.
On routes where we have specific waypoints (junctions, water sources, fuel stops, hazards), we include them in the route guide with full GPS coordinates. Download them to your device before the trip.
Communication equipment
On paved roads in populated areas, your phone works. On unpaved roads in remote areas, it probably does not. Plan accordingly.
Cell coverage expectations by country
| Country | Rural Coverage | Desert/Mountain Coverage | Notes |
|---|---|---|---|
| Jordan | Moderate | Poor in Wadi Rum desert | Zain has best desert coverage |
| Georgia | Good in valleys | Poor/none above 2000m | No coverage on Tusheti road |
| Iceland | Good along Ring Road | None in highlands | F-roads: assume no coverage |
| Albania | Patchy in mountains | None in remote areas | Vodafone Albania has best rural coverage |
| Montenegro | Good on coast | Poor in highlands | Sinjajevina: no coverage |
| South Africa | Good near towns | None in Baviaanskloof | Vodacom has best rural coverage |
| Namibia | Major towns only | None between towns | Skeleton Coast: zero coverage |
| Tanzania | Good in Arusha/parks HQ | Patchy in parks | Vodacom Tanzania |
| Ethiopia | Patchy everywhere | None on mountain routes | Ethio Telecom is sole provider |
| Morocco | Good in Atlas towns | Poor on pistes | IAM has best desert coverage |
| Oman | Good | Patchy in mountains/desert | Omantel |
| Romania | Good | Patchy in deep Carpathian valleys | |
| Bosnia | Good in valleys | Poor in highlands |
Satellite communication
For any route where you will be out of cell coverage for more than a few hours, carry a satellite communication device. Options:
Garmin inReach Mini 2. Our preferred device. Two-way text messaging via the Iridium satellite network. SOS button connected to the GEOS 24/7 emergency coordination center. Basic navigation. Subscription plan required ($15-65/month depending on message allowance). Weighs 100g.
SPOT Gen4. One-way messaging and SOS only. Cheaper subscription. Less versatile than the inReach but adequate if you only need emergency capability.
Satellite phone. The nuclear option. Full voice calls from anywhere on Earth. Rental phones available in Namibia, South Africa, and Iceland. Expensive ($5-10/minute) but nothing else gives you voice communication from the middle of the Namib.
We carry an inReach Mini on every trip rated “Moderate” or above. On “Easy” routes in countries with reasonable cell coverage, we leave it in the bag but bring it along.
Water and fuel planning
These are covered in detail in our fuel range planning guide, but the summary:
Water. Carry a minimum of 5 litres per person per day in hot climates (Jordan, Oman, Morocco, Namibia, Ethiopia, Tanzania). In temperate climates (Iceland, Georgia, the Balkans), 3 litres per person per day. This is drinking water only — carry additional water for vehicle cooling (a radiator can lose water on steep climbs) and washing (mud on the windshield, mud on your hands, mud everywhere).
Fuel. Off-road driving increases fuel consumption by 30-50% compared to highway driving. In sand, it can double. Calculate your fuel range based on worst-case consumption, not the optimistic number from the manufacturer’s spec sheet. If the next fuel station is 300 km away and your calculated range is 320 km, that is not enough margin. You need a jerry can. See the full fuel planning guide for the maths.
Driving technique by terrain
This is a primer, not a course. If you have never driven off-road, practice in easy conditions before attempting anything rated “Moderate” or above.
Gravel
The most common off-road surface. The main risks are corrugations (washboard ridges), loose stones, and reduced braking distance.
- Reduce speed. The temptation on a long straight gravel road is to drive at highway speed. Resist it. At 100 km/h on gravel, your braking distance is roughly double what it is on pavement.
- Corrugations have a resonant speed — a speed at which the vibration is worst. Sometimes speeding up slightly reduces the vibration. Sometimes it makes it worse. Experiment, but do not go so fast that you cannot stop if the road surface changes suddenly.
- Loose gravel on corners is where most off-road accidents happen. Slow down before the corner, not in it. Brake on the straight, steer through the curve.
Sand
The cardinal rule of sand driving: maintain momentum. A vehicle moving forward at a steady speed planes across soft sand like a boat on water. A vehicle that stops sinks. Once you are sinking, you are stuck.
- Deflate tires (see the table above). This is not optional in soft sand.
- Use low-range if available. Low-range gives you more torque at low speed, which means the wheels turn steadily without spinning.
- If you feel the vehicle slowing, do not accelerate hard. Spinning wheels dig trenches. Instead, steer slightly left and right — the slight weaving finds firmer sand and maintains forward progress.
- If you stop in soft sand, do not restart by flooring the accelerator. You will dig in instantly. Instead, reverse a few metres onto the compacted track you just created, then try again with steady momentum.
Mud
Mud is the terrain where 4WD matters most. Two-wheel drive in mud is largely useless because the driving wheels spin and the non-driving wheels have no traction to push the vehicle.
- Keep a steady speed. Like sand, momentum is your friend.
- Steer straight where possible. Turning in mud requires more traction than driving straight.
- If the mud has ruts, decide whether to straddle them or drive in them. Straddling keeps you higher but risks sliding into a rut sideways. Driving in the ruts keeps you aligned but risks grounding on the central ridge. There is no universal right answer — it depends on the rut depth and your ground clearance.
Rocky terrain
The opposite of sand driving. In rocks, slow is good. Precise wheel placement matters more than momentum.
- Pick your line. Look 10-20 metres ahead and plan which rocks your tires will go over and which they will go between.
- Use low-range first or second gear. Crawl speed. The engine brakes the vehicle on descents, which is much safer than using the brake pedal on loose rock.
- Avoid straddling large rocks — they can catch the undercarriage, differential, or exhaust. Go over them with one tire instead.
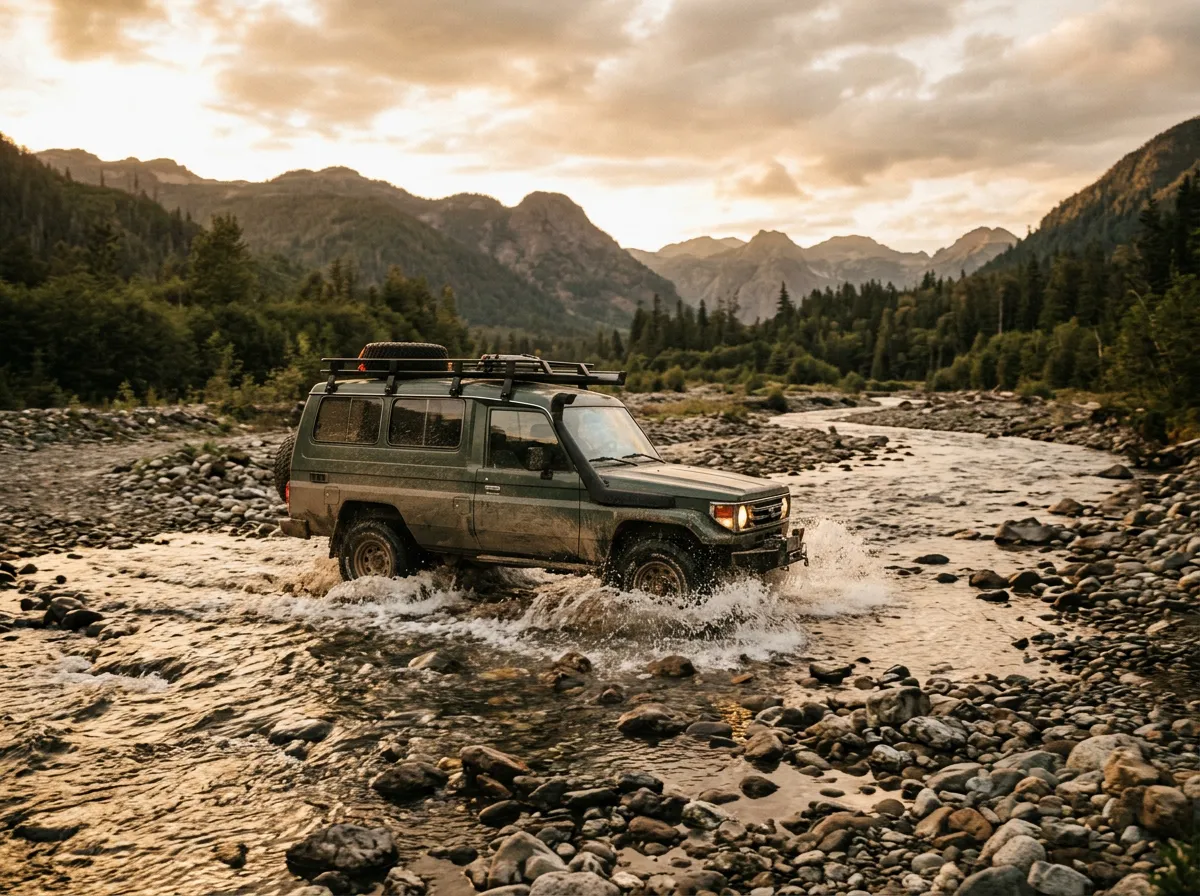
River crossings
The most consequential terrain type because the penalty for getting it wrong is waterlogged engine, destroyed electronics, or a vehicle washed downstream.
- Walk the crossing first. Every time. Check depth, current speed, and the bottom surface (rock, sand, mud). A crossing that looks calm from the bank can have a 50 cm drop-off two metres in. We have waded crossings in our shoes more times than we can count. Wet feet are better than a drowned engine.
- Know your vehicle’s wading depth. Most rental 4x4s can handle 50-70 cm of still water. The air intake height is the hard limit — water in the air intake destroys the engine instantly.
- Enter slowly, maintain steady speed. The goal is to push a bow wave ahead of you that lowers the water level at the engine bay. Enter too fast and you splash water over the bonnet. Enter too slow and the water rises around the vehicle.
- After crossing, drive for a few minutes and then test the brakes. Wet brake discs have almost no stopping power until they dry. Tap the brakes lightly while driving to heat them and evaporate the water.
When stuck
It will happen. Here is the protocol.
- Stop. Do not keep trying. Spinning wheels make the situation worse.
- Assess. Get out and look. What is the vehicle stuck on? Sand? Mud? A rock under the chassis? How deep are the wheels buried? Is the vehicle level or tilted?
- Deflate. If you have not already, reduce tire pressure. Sometimes 4-5 PSI less is enough to regain traction.
- Clear the path. Dig sand or mud away from in front of the tires. Create a ramp of firmer material (rocks, branches, recovery boards) for the tires to climb onto.
- Recovery boards. Place them flat in front of (or behind, if reversing) the driven wheels. Drive steadily onto the boards. Do not spin the wheels — the boards will shoot out behind the vehicle at speed, which is dangerous.
- Tow out. If self-recovery fails and another vehicle is available, use a tow strap attached to proper recovery points. The stuck vehicle should be in neutral or low-range first gear, not braked. The pulling vehicle should use steady force, not a jerking start.
- Call for help. If self-recovery and assisted recovery both fail, use your satellite communicator or phone to call for recovery. Do not leave the vehicle to walk for help unless you are certain of the distance to assistance and have adequate water.
The most important thing: stay calm and methodical. Being stuck is inconvenient, not dangerous, as long as you have water, shelter (the vehicle), and communication.
The equipment checklist
Print this. Tape it to the inside of the glovebox.
| Item | Easy Routes | Moderate Routes | Challenging/Expert |
|---|---|---|---|
| Tire pressure gauge | Yes | Yes | Yes |
| 12V air compressor | Yes | Yes | Yes |
| Tow strap + shackles | Recommended | Yes | Yes |
| Recovery boards (pair) | No | Recommended | Yes |
| Shovel (folding) | No | Recommended | Yes |
| Hi-lift or exhaust jack | No | No | Yes |
| Tire repair kit (plug type) | Recommended | Yes | Yes |
| Basic tool kit | Yes | Yes | Yes |
| First aid kit | Yes | Yes | Yes |
| Headlamp | Yes | Yes | Yes |
| Offline maps (2 apps minimum) | Yes | Yes | Yes |
| Paper map of region | Recommended | Yes | Yes |
| Satellite communicator | No | Recommended | Yes |
| Extra water (5L+ per person) | Yes (hot climates) | Yes | Yes |
| Extra fuel (jerry can) | No | Route-dependent | Yes |
| Fire extinguisher | No | Recommended | Yes |
| Snatch strap | No | No | Recommended |
| Winch | No | No | Useful if available |
A note on driving with someone else’s vehicle
We rent vehicles for most of our trips. This means we are driving unfamiliar machines on challenging terrain, which adds a layer of risk that vehicle owners do not have. We mitigate it by:
- Spending 30 minutes in the car park before leaving. Adjusting mirrors, testing 4WD engagement, finding the jack, locating the spare, understanding the dashboard lights.
- Driving the first 20-30 km on easy terrain to learn the vehicle’s handling, turning circle, braking response, and blind spots.
- Not pushing the vehicle beyond what we would push our own. A rental contract does not cover pride, only liability.
Rental vehicles are tools. Treat them well, check them thoroughly, and bring them back in the condition you would want to receive them. The rental company’s bottom line depends on it, and so does the next person who rents that vehicle for a trip like yours.
| Choosing the right rental vehicle | Insurance for dirt roads | Fuel range planning |